
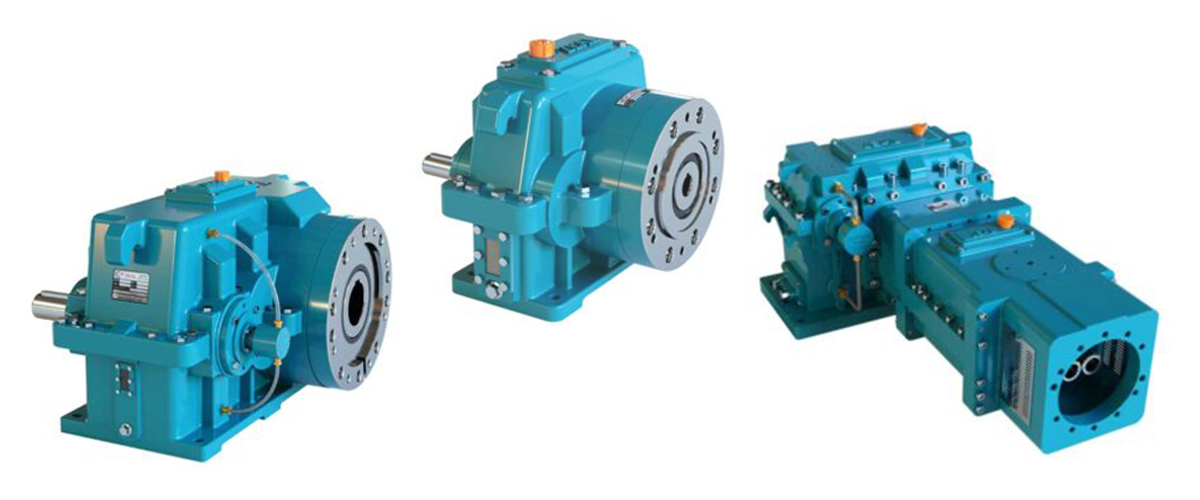
An unexpected gearbox failure on a plastic extrusion line does not just stop one machine. In a tightly scheduled production environment, it stops all the downstream processes that depend on that line — cooling tanks drain, haul-off equipment sits idle, pelletisers spin on nothing. For high-volume continuous production operations, every hour of unplanned downtime can cost tens of thousands of rupees in lost output, wasted raw material, missed delivery commitments, and overtime labour to recover the schedule. Yet the overwhelming majority of extrusion gearbox failures are not random mechanical events — they are predictable, progressive, and preventable. The same failures appear repeatedly across the plastic processing industry, in the same components, for the same underlying reasons. Gear tooth surface pitting develops slowly over months of inadequate lubrication before a tooth fractures. Bearing raceway fatigue announces itself through increasing vibration long before a rolling element shatters. Shaft seal deterioration shows as minor oil seepage weeks before serious leakage begins. In almost every case, the physical evidence of the developing failure was present and detectable — but it was either not observed or not acted upon. This guide provides a complete, practical reference for every common gearbox failure mode in plastic extrusion machines. For each failure type, we explain the precise mechanism by which it develops, the early warning signs that appear before catastrophic failure, the root causes that initiate it, and the specific preventive actions that will stop it from developing. At the end, we provide a complete preventive maintenance checklist and a guide to when repair is viable versus when full replacement is the correct choice. Whether you are running a single extrusion line or a large multi-machine facility, this guide will help you move from reactive breakdown maintenance to a proactive regime that protects your gearboxes and your production schedule.
The True Cost of Gearbox Failure in Plastic Extrusion
Before examining the individual failure modes, it is important to understand the full cost of an extrusion gearbox failure — because the true cost is almost always significantly larger than the cost of the gearbox itself, and this understanding is what justifies the investment in preventive maintenance.
| Cost Category | Typical Impact |
| Lost production output | Every hour of downtime = 1 to 4+ tonnes of lost extrudate depending on line size |
| Wasted raw material in barrel | Material in barrel at failure must be purged — 20 to 80 kg of waste per incident |
| Emergency gearbox sourcing premium | Urgent procurement of replacement adds 20% to 50% to purchase price |
| Installation and alignment labour | Skilled labour for removal, alignment, and recommissioning — typically 8 to 24 hours |
| Downstream equipment disruption | Haul-off, pelletiser, winder equipment may need resetting after restart |
| Delivery schedule penalty | Missed customer deliveries may trigger penalty clauses or lost orders |
| Secondary component damage | If gearbox failure damages the extruder screw or barrel, repair cost multiplies |
| Overtime and recovery production | Extra shifts to recover lost output — labour premium of 50% to 100% |
A comprehensive study of plastic processing plant downtime consistently shows that the direct cost of the replacement gearbox accounts for only 15 to 25 percent of the total cost of an unplanned gearbox failure. The remaining 75 to 85 percent is indirect — lost production, emergency procurement premiums, labour, and downstream disruption. A gearbox that costs Rs 3 to 5 lakh to replace may cause Rs 15 to 25 lakh of total cost impact when unplanned failure occurs during a full production run.
Preventive maintenance that costs Rs 15,000 to 30,000 per year in oil changes, inspections, and condition monitoring can realistically prevent a Rs 15 to 25 lakh failure event from occurring — a return on investment ratio of 50:1 to 100:1. No other maintenance expenditure in an extrusion plant comes close to this return.
Overview: The 10 Most Common Gearbox Failure Modes
The following table provides a rapid-reference overview of the ten most common gearbox failure modes in plastic extrusion, with the primary cause, earliest warning sign, and consequence of each. The sections that follow examine each failure in detail.
| # | Failure Mode | Primary Root Cause | Earliest Warning Sign | Ultimate Consequence |
| 1 | Gear tooth surface pitting | Lubrication breakdown / overload | Fine metallic particles in oil | Tooth spalling — loss of tooth surface |
| 2 | Gear tooth root fracture | Overloading / material fatigue | Audible crack or sudden noise change | Catastrophic gear failure, shutdown |
| 3 | Gear tooth scuffing | Oil film failure at startup or overload | Scored tooth surface, temperature rise | Rapid tooth destruction if not stopped |
| 4 | Rolling bearing raceway spalling | Overload, contamination, fatigue | Vibration increase at mesh frequency | Bearing collapse, shaft damage |
| 5 | Thrust bearing failure | Axial overload / inadequate lubrication | Axial shaft play, noise increase | Output shaft movement, screw damage |
| 6 | Shaft seal leakage | Temperature, age, contamination | Oil seepage at shaft exit | Oil starvation, contamination ingress |
| 7 | Lubrication failure | Wrong oil, contamination, no change | Rising temperature, darker oil | Catastrophic wear — all components |
| 8 | Housing crack | Overload shock, casting defect | Oil seepage from housing surface | Shaft misalignment, cascade failure |
| 9 | Shaft fracture | Fatigue from repeated overload | Vibration, speed irregularity | Complete drive failure, potential injury |
| 10 | Coupling / key failure | Misalignment, shock loading | Torsional vibration, noise at coupling | Power interruption, secondary damage |
Failure 1 – Gear Tooth Surface Pitting and Spalling
Surface pitting is the most prevalent long-term failure mode in extruder gearboxes and the one that, when caught early, is most amenable to intervention before catastrophic failure occurs. It is a contact fatigue phenomenon — the result of cyclic contact stresses at the gear tooth mesh exceeding the surface fatigue limit of the gear material.
How Pitting Develops — The Progressive Failure Mechanism
Every time a gear tooth comes into mesh, an extremely high contact pressure — known as Hertzian contact stress — is generated at the tooth contact zone. In a healthy, well-lubricated gear pair, a full elastohydrodynamic (EHD) oil film separates the tooth surfaces, distributing the contact stress across a finite area and preventing metal-to-metal contact. Over millions of contact cycles, even in the presence of a good oil film, the cyclic subsurface shear stress causes small fatigue cracks to initiate just below the tooth surface.
These subsurface cracks propagate horizontally under the surface and eventually connect to the surface, causing small particles of metal to detach — leaving behind characteristic shallow, hemispherical pits on the tooth flank. Initial pitting (also called micropitting or grey staining) presents as a matte, grey-frosted appearance on the tooth surface. As pitting progresses, the pits coalesce and grow, removing increasing amounts of tooth material — a condition called destructive pitting or spalling. If unchecked, spalling can progress to the point where significant tooth material is lost, increasing backlash, reducing load-carrying capacity, and eventually leading to tooth fracture.
Accelerating Factors
- Inadequate Lubrication Film Thickness: If the oil viscosity is too low for the operating speed and load, or if the oil temperature is too high, the EHD film thickness falls below the combined roughness of the mating tooth surfaces, allowing asperity contacts that accelerate fatigue initiation dramatically.
- Operating Above the Contact Fatigue Limit: Running the gearbox consistently above its rated output torque subjects the gear tooth contact zones to stresses above the design fatigue limit, reducing the number of cycles to crack initiation proportionally.
- Oil Contamination: Hard particles in the gear oil — metallic wear debris, dust ingress, or silica from a poorly sealed gearbox — act as local stress raisers at the contact zone, initiating pitting at individual particle indentation sites.
- Inadequate Surface Hardness: Gears manufactured from lower-grade steels or improperly heat-treated gears with lower surface hardness have a lower contact fatigue limit and initiate pitting under lower contact stresses.
Early Warning Signs
- Fine, silvery metallic powder collecting on the oil drain plug magnet
- Elevated iron content on oil analysis (spectrometric analysis showing rising Fe ppm)
- Slight increase in gearbox noise — a subtle roughening of the normally smooth gear hum
- Very slight increase in vibration amplitude at the gear mesh frequency
Prevention Strategies
- Correct Oil Specification and Regular Changes: Use the manufacturer-specified oil grade and viscosity. Change oil at the recommended intervals. Oil condition monitoring (spectrometric analysis every 6 months) provides the earliest possible detection of elevated wear particle concentrations.
- Correct Gearbox Sizing with Adequate Service Factor: A gearbox sized with a service factor of 1.5 or greater operates at 67% of its rated contact fatigue capacity — well within the safe range. Gearboxes operating at or near 100% of rated capacity accumulate contact fatigue damage far more rapidly.
- Oil Filtration: Installing a fine oil filter (10 to 25 micrometre absolute) in the lubrication circuit removes hard particles before they can cause surface pitting. Even simple splash-lubricated gearboxes benefit from a magnetic drain plug that is checked and cleaned monthly.
- Temperature Management: Maintaining oil temperature below 75 degrees Celsius ensures adequate oil film thickness. Every 10 degree Celsius reduction in oil temperature approximately doubles the EHD film thickness at the gear contact — a powerful argument for effective cooling system maintenance.
Failure 2 – Gear Tooth Root Bending Fatigue and Fracture
If gear tooth surface pitting is the slow-burn failure mode that develops over years, gear tooth root fatigue fracture is its dramatic counterpart — potentially catastrophic and often sudden. A fractured gear tooth in a running extruder gearbox can cause immediate, complete drive failure and can send tooth fragments through the housing or into other gear meshes, causing cascading damage that requires complete gearbox replacement.
The Bending Fatigue Mechanism
Each gear tooth is a cantilevered beam loaded at its tip by the tangential force of the gear mesh. Every time the tooth comes into engagement, this bending load is applied to the tooth root — the zone of maximum bending stress and the location where fatigue cracks initiate. Under normal operating conditions and correct sizing, the bending stress at the root is below the material’s bending fatigue limit, and the tooth can sustain millions of load cycles without crack initiation.
When the bending stress exceeds the fatigue limit — through overloading, repeated cold-start shock loads, or material defects at the tooth root — a fatigue crack initiates at the root fillet and propagates progressively through the tooth section with each subsequent load cycle. The crack typically grows across 70 to 90 percent of the tooth cross-section before the remaining section fractures suddenly under a single load application. This is the classic brittle-mode fatigue fracture: slow crack growth followed by sudden, complete separation.
Root Causes Specific to Extrusion Applications
- Cold-Start Overloading on PVC and High-Viscosity Materials: As detailed in our torque requirements guide, cold-starting an extruder with rigid PVC or highly filled compounds in the barrel before the material has reached processing temperature generates torque spikes of 3 to 12 times the steady-state running torque. Each cold-start overload event applies a bending stress spike above the fatigue limit, contributing to cumulative fatigue damage at the tooth root.
- Gearbox Undersizing: When a gearbox is originally undersized for the process torque, the gear teeth operate above their bending fatigue limit on every load cycle. Fracture becomes a matter of accumulated cycle count rather than a random event.
- Material Changes Without Torque Recalculation: Switching from LDPE or HDPE to rigid PVC or filled compounds without verifying that the gearbox torque rating is adequate for the new material is a common cause of tooth root fatigue fracture.
Prevention Strategies
- Enforce Warm-Up Procedures: Never run the extruder screw at full speed from cold on rigid PVC or highly viscous materials. A documented warm-up procedure that brings the barrel to processing temperature before the screw starts prevents the highest torque spikes that initiate tooth root cracks.
- Install a Torque-Limiting Coupling: A torque-limiting coupling set at 150 to 200 percent of normal running torque provides absolute protection against cold-start overloads that exceed the gear tooth bending fatigue limit.
- Specify Adequate Service Factor for the Most Demanding Material: Use the material-specific service factor guidance to ensure the gearbox is sized for the worst-case material and condition it will process — not just the average.
- Shot-Peened Gear Teeth: Specifying gearboxes with shot-peened tooth roots (see our materials guide) significantly increases the bending fatigue limit through compressive residual stresses, providing additional margin against root crack initiation.
Failure 3 – Gear Tooth Scuffing (Adhesive Wear)
Scuffing is a different category of gear failure from the fatigue failures described above. While pitting and tooth fracture are gradual accumulation failures, scuffing is a rapid, friction-driven failure that can destroy gear tooth surfaces within minutes or even seconds of onset. It occurs when the lubricating oil film between meshing gear teeth collapses completely, allowing direct metal-to-metal contact at the sliding contact zones on the tooth flank.
The Scuffing Mechanism
When metal-to-metal contact occurs under high sliding velocity and pressure at the gear tooth interface, the asperities of the two metal surfaces bond together momentarily through adhesion — the same mechanism that causes cold welding of clean metal surfaces under vacuum. As the gears continue to rotate, these micro-welds are torn apart, tearing material from one or both tooth surfaces and depositing it as transfer material on the opposing surface. The result is a characteristic scored, torn, or smeared appearance on the tooth flanks — quite distinct from the pitted appearance of contact fatigue failure.
Scuffing generates intense local heat at the contact zone and can produce temperatures of several hundred degrees Celsius at the contact interface within fractions of a second. This local heating further degrades the oil film, accelerates the adhesion process, and can cause local phase transformation of the steel surface (visible as dark, tempered patches on the tooth flanks). Once scuffing begins, it is self-accelerating — the surface damage increases friction, which generates more heat, which further collapses the oil film.
Common Causes in Extrusion Gearboxes
- First Load Application on New Gearboxes Without Running-In: New gears, despite precision grinding, have microscopic surface irregularities that concentrate contact stress during initial load application. Running a new gearbox at full load immediately without a running-in period (progressively increasing load over the first 100 to 200 operating hours) risks scuffing on first load.
- Oil Film Failure During Cold Start: At very low ambient temperatures, high-viscosity oil flows poorly and takes time to reach the gear contacts. If a gearbox is started at full load from a cold soak below 5 to 10 degrees Celsius, the oil film may be inadequate for the first few minutes until the oil warms and reaches the contacts.
- Wrong Oil Viscosity Grade: Oil that is too thin for the operating conditions cannot maintain the EHD film thickness required at the contact pressure and sliding velocity. Very thin oil can result in scuffing at normal operating conditions.
- Inadequate EP Additive Package: The extreme pressure additives in the oil provide emergency scuffing protection when film thickness is marginal. Using a non-EP oil or an oil with a depleted additive package removes this last line of defence.
Scuffing Emergency Response
If scuffing is occurring (identified by sudden noise increase, smell of burnt oil, or rising temperature):
- Stop the machine immediately — every additional second of operation causes more damage
- Do NOT restart until the gearbox has been fully inspected
- Inspect all gear tooth flanks for scoring or material transfer
- Check oil level, viscosity, and contamination
- Identify and eliminate the root cause before restarting
Light scuffing (initial stages) may be recoverable with thorough cleaning, fresh oil, and running-in.
Severe scuffing requires gear replacement.
Failure 4 – Rolling Bearing Fatigue and Raceway Spalling
Rolling element bearings are precision components that, when correctly specified, installed, and lubricated, provide tens of thousands of operating hours of reliable service. However, they are also sensitive components that can fail in a fraction of their designed service life when subjected to operating conditions outside their design envelope. Bearing failure is the second most common cause of extrusion gearbox damage after lubrication-related gear tooth wear.
Sub-Surface Fatigue — The Primary Bearing Failure Mode
The same contact fatigue mechanism that causes gear tooth pitting also applies to rolling element bearings. Under each rolling contact of a ball or roller with the bearing race, a cyclic stress field is generated below the contact surface. Over millions of contact cycles, fatigue cracks initiate at subsurface stress concentration sites — typically at non-metallic inclusions in the bearing steel — and propagate to the surface, causing raceway spalling. The spalled material detaches as flakes, increasing vibration levels, roughening the raceways, and accelerating subsequent wear.
Additional Failure Modes Specific to Extrusion Gearbox Bearings
- Misalignment: If the gearbox input or output shafts are not accurately aligned with the motor shaft and extruder screw shaft respectively, the misalignment applies a cyclic bending load to the bearing inner ring that concentrates the contact load on one side of the bearing raceway. This asymmetric loading dramatically reduces bearing fatigue life — a 0.1 degree shaft misalignment can reduce L10h bearing life by 50 percent.
- Overloading from Incorrect Gearbox Specification: When a gearbox is undersized, the bearings as well as the gears carry loads above their rated capacity. Bearing fatigue life is inversely proportional to the cube of the applied load — a 20% overload reduces bearing life by approximately 50%.
- Contamination: Hard particles in the bearing lubricant cause indentations on the bearing raceways and rolling element surfaces. These indentations act as stress concentration points that initiate fatigue cracks much earlier than would occur on a clean, undamaged surface. Oil contamination is estimated to reduce bearing L10h life by 50 to 90% depending on particle size and concentration.
- Electrical Erosion (EDM Pitting): On machines with variable speed drives, stray electrical currents can discharge through the bearing — particularly if the motor earth bonding is inadequate — creating characteristic frosted or pitted raceways through electrodischarge machining. This failure mode is becoming more common with the widespread adoption of VSD-driven extrusion motors.
Early Warning Signs and Monitoring
- Vibration Analysis: Bearing fatigue produces characteristic vibration signals at multiples of the bearing defect frequencies (ball pass frequency outer race, ball pass frequency inner race, ball spin frequency). Periodic vibration measurement with a vibration analyser provides early warning of developing raceway damage weeks or months before audible noise appears.
- Audible Noise: A regular clicking, rumbling, or grinding sound from the gearbox housing — distinct from the normal smooth gear hum — can indicate bearing raceway damage or rolling element fracture.
- Oil Analysis: Rising iron and chromium content in oil analysis samples indicates increasing bearing wear rate, even before vibration changes are detectable.
- Temperature: A failing bearing generates extra heat through increased friction. A bearing position that is consistently warmer than it was at last check, at the same load, is an indication of developing wear.
Prevention Strategies
- Precision Shaft Alignment at Installation: Use laser alignment equipment to align motor-to-gearbox and gearbox-to-extruder shaft couplings to within 0.05 mm parallel offset and 0.03 degrees angular misalignment. Verify alignment annually.
- Correct Bearing Pre-loading: Thrust bearing pairs must be assembled with the correct pre-load to prevent roller skewing and to distribute the axial load evenly. Incorrect pre-loading (too much or too little) significantly reduces bearing service life.
- Oil Filtration: In forced-feed lubrication systems, a 10 micrometre absolute filter removes the hard particles that are the primary cause of premature bearing failure. Even in splash-lubricated systems, a magnetic drain plug and regular oil changes remove accumulated metallic contamination.
- Motor Earth Bonding: Ensure motor earth bonding straps are installed and in good condition. Use insulated bearing housings or bearing isolation rings on the drive side to prevent stray current passage through bearings on VSD-driven machines.
Failure 5 – Thrust Bearing Failure
The thrust bearing failure in an extruder gearbox deserves a dedicated section because of its uniquely catastrophic consequences and its specific failure characteristics that differ from general radial bearing failure. The thrust bearing in an extruder gearbox is the single most highly loaded bearing in the drive system — it must absorb the entire axial reaction force from the extruder screw, which in a large extruder can reach several hundred kilonewtons continuously.
Why Thrust Bearing Failure is Particularly Damaging
When a radial bearing fails in a gearbox, the shaft loses its radial positioning but typically continues to rotate with increasing noise and vibration for a period that allows the machine to be stopped before secondary damage occurs. When a thrust bearing fails, the output shaft loses its axial positioning — the extruder screw begins to move axially under the reaction force, which had previously been absorbed by the thrust bearing. This axial movement can cause the screw flights to contact the barrel bore, destroying both the screw and the barrel — components that are typically far more expensive than the gearbox thrust bearing itself.
Causes of Thrust Bearing Failure
- Axial Overload Beyond Rated Capacity: Operating at die pressures or screw back-pressures higher than the gearbox thrust bearing rating, or using the gearbox on a larger diameter screw than specified, subjects the thrust bearing to loads beyond its design capacity.
- Inadequate Lubrication to the Thrust Bearing: In splash-lubricated gearboxes, the thrust bearing position may not receive adequate oil splash at very low screw speeds. This is a particular risk during startup purge cycles when the screw may run slowly for extended periods.
- High Axial Shock Loads: Sudden increases in die pressure — from blockages, hardened material lumps, or screen pack blinding — generate axial shock loads that can exceed the thrust bearing’s dynamic capacity even if the sustained static capacity is adequate.
- Incorrect Bearing Selection at Original Specification: Standard industrial gearboxes that have not been specifically designed for extruder duty often have undersized thrust provisions. This is the fundamental reason why purpose-built extruder gearboxes are essential for extrusion duty.
Prevention Strategies
- Specify a Purpose-Built Extruder Gearbox: Always use a gearbox specifically designed and rated for extruder duty, with a thrust bearing assembly rated for the full axial screw load. Never use a standard industrial gearbox on an extruder.
- Monitor and Control Maximum Back Pressure: Install a melt pressure transducer at the screw tip position and set an alarm and trip at the maximum safe operating pressure. Preventing excessive die pressure prevents axial overloads on the thrust bearing.
- Regular Axial Play Measurement: Check the axial play of the output shaft annually by attempting to move the shaft manually with a dial indicator — with the machine stopped and depressurised. Any perceptible axial movement beyond the specified clearance indicates thrust bearing wear.
- Maintain Lubrication at Low Speeds: If the machine regularly operates at very low screw speeds for purging, ensure the lubrication system provides adequate oil to the thrust bearing at these speeds. Forced-feed lubrication is preferred for extruders that spend significant time at very low speed.
Failure 6 – Shaft Seal Leakage and Failure
Shaft seal failure is the most frequently observed maintenance issue on extrusion gearboxes — more common than gear or bearing failure in terms of occurrence frequency. While it is rarely immediately catastrophic (unlike gear tooth fracture or thrust bearing failure), chronic shaft seal leakage has consequences that extend far beyond the inconvenience of oil on the floor.
The Dual Consequences of Seal Failure
Shaft seal failure has two simultaneous and equally important consequences: oil leaks out, and contaminants leak in. The oil loss is the visible, obvious symptom. The contaminant ingress — plastic dust, glass fibre particles, moisture — is the hidden, more damaging consequence. The fine, abrasive particles generated in a plastic extrusion environment are highly damaging to gear tooth surfaces and bearing raceways when they enter the gearbox oil. A failed outboard seal that allows plastic dust to contaminate the oil can trigger accelerated gear tooth pitting and bearing wear that causes major component failures within 12 to 24 months of seal failure.
How Seals Fail
- Heat-Related Lip Hardening: NBR rubber lip seals exposed to continuous oil temperatures above 80 to 100 degrees Celsius harden and lose their flexibility, causing the lip to lose contact with the shaft surface. The seal stops functioning as a dynamic seal and becomes a static ring through which oil weeps. FKM seals resist this hardening significantly better, sustaining seal function up to 200 degrees Celsius.
- Abrasive Wear of the Seal Lip: In plastic extrusion environments where the air contains abrasive dust (particularly glass fibre or mineral filler dust), the abrasive particles accumulate at the outboard seal-shaft interface and gradually wear through the seal lip. A secondary seal or dust excluder prevents particles from reaching the primary seal lip, dramatically extending seal service life.
- Shaft Surface Wear at the Seal Interface: The hardened steel shaft surface at the seal contact zone develops a wear groove over time — a shallow circumferential groove that prevents the new replacement seal from sealing effectively even when the old seal is replaced. Fitting a repair sleeve over the worn shaft surface restores a fresh sealing surface for the new seal.
- Internal Pressure Build-Up: If the gearbox breather is blocked or absent, internal pressure builds up as the oil and air heat during operation, forcing oil past the seal lips. A correctly functioning, clean breather is essential for long seal life.
Prevention Strategies
- Use FKM (Viton) Seals: Specify fluoroelastomer seals for all extrusion gearbox applications. Their superior temperature resistance and chemical compatibility with gear oil provides 3 to 5 times the service life of standard NBR seals.
- Install and Maintain Secondary Seals: A V-ring or labyrinth secondary seal outboard of the primary lip seal is the single most effective measure for extending primary seal life in dusty extrusion environments.
- Keep the Breather Clean: Check and clean the gearbox breather filter every 3 months in dusty environments. A blocked breather is one of the most common and easily avoidable causes of accelerated seal failure.
- Control Oil Temperature: Every 10 degree Celsius reduction in oil temperature approximately doubles seal service life for temperature-limited failures. Effective cooling system maintenance directly benefits seal longevity.
Failure 7 – Lubrication System Failure
Lubrication failure is not a single failure mode — it is the enabler of almost every other failure mode. When the lubrication system fails to provide adequate, clean, correctly viscous oil to every gear mesh and bearing in the gearbox, the consequences cascade through every other component. Lubrication failure is the root cause of the majority of gear tooth pitting, gear tooth scuffing, and rolling bearing failures observed in the field.
Forms of Lubrication Failure
- Oil Starvation: Insufficient oil quantity — from an inadequate initial fill, oil leakage over time, or incorrect specification of the oil change volume — means that some gear meshes and bearing positions receive no oil film, exposing them to dry or boundary lubrication conditions. Even brief periods of oil starvation can initiate scuffing damage that takes months to fully manifest.
- Wrong Oil Viscosity Grade: Using the wrong ISO viscosity grade — too thin or too thick — compromises oil film formation at the gear contacts. Too thin an oil provides inadequate EHD film thickness. Too thick an oil creates excessive churning losses, elevated temperature, and in some cases inadequate oil delivery to high-speed, tight-clearance bearing positions.
- Degraded Oil: Oil that has been in service beyond its useful life becomes oxidised, darkened, acidic, and loaded with sludge and varnish products. Degraded oil has significantly reduced film-forming capability — its viscosity may have changed, its anti-wear and EP additives are depleted, and its base oil oxidation products can attack metal surfaces.
- Water Contamination: Water in gearbox oil — from a cooling coil leak, condensation, or process moisture — causes oil emulsification that completely destroys the oil’s lubricating properties. Water-contaminated oil appears milky or grey and must be completely replaced immediately.
- Hard Particle Contamination: As described in the bearing failure section, hard particles in the oil cause surface indentation damage that reduces component fatigue life by 50 to 90%.
The Oil Change — The Single Most Important Gearbox Maintenance Action
Oil change intervals for mineral gear oil: Every 3,000 to 5,000 operating hours
Oil change intervals for synthetic PAO oil: Every 8,000 to 12,000 operating hours
If oil temperature exceeds 80°C: Halve the above intervals
If heavy dust contamination is present: Change oil at 2,000 to 3,000 hour intervals
The oil change is the single maintenance action with the greatest impact on gearbox service life.
Skipping an oil change at 5,000 hours to save Rs 3,000 can cause Rs 15 lakh+ in gearbox damage.
Failure 8 – Housing Crack and Structural Failure
Gearbox housing cracks are less common than the component-level failures described above, but when they occur they are serious — both because of the immediate oil loss and because a cracked housing compromises the geometric alignment of all shafts and gears, potentially triggering secondary failures across the entire gearbox.
Causes of Housing Cracks
- Casting Defects: Grey cast iron housings can contain internal porosity, shrinkage voids, or cold shuts from the casting process that act as stress concentration sites. Under the cyclic loads of continuous operation, cracks initiate at these defects. This is why quality gearbox manufacturers conduct non-destructive testing (NDT) of critical housing sections.
- Severe Shock Loading: An extreme overload event — such as a completely blocked die or a catastrophic screw seizure — can generate impact torques far above the housing’s structural design limit, causing immediate cracking. These are relatively rare but are typically the result of using the machine beyond its rated capacity or without appropriate overload protection.
- Improper Mounting: Mounting the gearbox on an uneven or insufficiently rigid base causes bending moments in the housing as the base deflects under load. Over time, this imposed bending stress can initiate fatigue cracks in the housing walls at stress concentration points.
- Incorrect Bolt Torquing: Over-torquing housing bolts during assembly or maintenance can create stress concentrations around bolt holes that initiate cracks under cyclic operation.
Prevention Strategies
- Rigid, Flat Mounting Surface: Ensure the gearbox mounting surface is flat to within 0.1 mm and rigid enough to support the gearbox without deflection under load. Grout-fill any gaps between the gearbox feet and the mounting base.
- Overload Protection: A torque-limiting coupling between the motor and gearbox limits the maximum torque applied to the housing under any fault condition, preventing the extreme overloads that cause housing fracture.
- Correct Bolt Torquing: Always use a calibrated torque wrench for housing bolts and follow the manufacturer’s specified torque values. Never rely on impact tools for final tightening of critical housing joints.
- Annual Visual Housing Inspection: A thorough visual inspection of all external housing surfaces for crack indications, oil seepage from surface cracks, or changes in housing geometry should be part of the annual maintenance procedure.
Failure 9 – Shaft Fatigue and Fracture
Shaft fracture is one of the rarest but most dramatic failure modes in extruder gearboxes. A fractured shaft in a running gearbox releases the stored rotational energy of the motor and screw simultaneously, potentially causing significant mechanical damage to adjacent components and — if the shaft fractures at the coupling — to the motor or extruder.
Shaft fracture in extruder gearboxes is almost exclusively a fatigue failure — the result of a crack that initiated at a stress concentration (keyway corner, shoulder fillet, surface defect, or corrosion pit) and propagated progressively under the cyclic bending and torsional stresses of operation until the remaining cross-section was insufficient to carry the load.
Prevention centres on correct shaft specification (using the appropriate alloy steel grade with sufficient strength for the combined torque and bending loads), correct keyway design (adequate fillet radii to minimise stress concentration), precise shaft alignment to minimise cyclic bending loads, and protecting shaft surfaces from corrosion pitting that acts as fatigue crack initiation sites.
Failure 10 – Coupling and Key Failure
The coupling between the motor and gearbox, and between the gearbox and extruder screw, is a frequently overlooked component in gearbox maintenance planning. Yet coupling failures — while not causing gearbox damage directly — stop the machine immediately and, in the case of rigid or semi-rigid couplings that fail catastrophically, can cause significant secondary damage to nearby components.
- Flexible Coupling Element Fatigue: The elastomeric element (polyurethane or rubber spider) in a flexible coupling absorbs misalignment and torsional vibration. Over time, this element fatigues and degrades — particularly if the misalignment is excessive or if the coupling is operated above its rated torque. The element typically shows progressive cracking before complete failure, providing a visual warning if inspected regularly.
- Key and Keyway Failure: The parallel key and keyway that transmit torque between shaft and coupling hub can fail by shear (if overloaded above their shear capacity), by fretting fatigue (if the fit is too loose and allows relative movement under cyclic load), or by corrosion (if moisture enters the keyway interface). Correct key specification, correct dimensional fit, and adequate lubrication of the keyway interface prevent most key failures.
- Interference Fit Coupling Slippage: Interference-fit coupling hubs rely on the compressive friction between hub bore and shaft to transmit torque. Repeated overloads or incorrect hub fitting can cause progressive slippage that damages both the hub bore and the shaft surface.
The Failure Cascade – How One Failure Triggers the Next
One of the most important concepts in extrusion gearbox failure analysis is the failure cascade — the mechanism by which a single initiating failure, if not detected and addressed, progressively triggers secondary and tertiary failures across multiple components, transforming a minor and repairable issue into a major and expensive catastrophe.
A Typical Failure Cascade in an Extrusion Gearbox
INITIATING EVENT: Oil change overdue → oil degraded and depleted
Stage 1: Inadequate oil film → gear tooth surface micropitting begins
Stage 2: Pitting produces metallic particles → oil contamination increases
Stage 3: Contaminated oil abrades bearing raceways → bearing wear rate rises
Stage 4: Bearing wear produces more metallic particles → oil further contaminated
Stage 5: Degraded oil film on gears → oil temperature rises (more friction)
Stage 6: Rising temperature degrades shaft seals → oil leaks out
Stage 7: Oil level falls → gear meshes and thrust bearing starved of oil
Stage 8: Catastrophic gear tooth scuffing and/or thrust bearing collapse
Total time from initiation to catastrophic failure: 6 to 18 months
Initiating event prevented by: one oil change (cost: Rs 3,000 to 8,000)
Final failure cost: Rs 15 to 50 lakh (gearbox + screw damage + downtime)
This cascade pattern is not hypothetical — it describes the actual failure history of a significant proportion of premature extrusion gearbox failures. The lesson is that early intervention — at Stage 1 or Stage 2 — is exponentially less expensive than intervention at Stage 7 or 8. This is the fundamental argument for condition monitoring and regular oil analysis as tools for breaking the cascade before it progresses.
Condition Monitoring – Detecting Failures Before They Happen
Condition monitoring is the systematic observation and measurement of gearbox health indicators over time. Unlike calendar-based maintenance that replaces components on a fixed schedule regardless of their actual condition, condition monitoring provides objective data on the actual state of each component — allowing intervention to be scheduled exactly when needed, and not before.
Method 1 — Oil Analysis (Spectrometric Analysis)
Periodic oil sampling and laboratory analysis is the most powerful single condition monitoring technique available for extruder gearboxes. A 100 ml oil sample sent to a laboratory every 3 to 6 months provides information on: total iron content in ppm (gear and shaft wear), chromium content in ppm (bearing race wear), oil viscosity at 40 and 100 degrees Celsius (confirming the oil is still within specification), acid number (measuring oil oxidation level), water content in ppm (detecting cooling coil leaks or condensation), and particle count (ISO 4406 code, measuring overall contamination level).
The trend of these values over successive samples is more informative than any individual result. A rising iron content over three or four samples indicates accelerating gear wear, even at concentrations that might not trigger concern in isolation. Establishing baseline values during the first year of operation and tracking deviations from baseline over time gives the earliest possible warning of developing failures.
Method 2 — Vibration Analysis
Vibration measurement at defined positions on the gearbox housing, using a handheld vibration meter or accelerometer, detects developing bearing and gear damage through the specific frequency signatures they produce. Gear tooth defects produce vibration at the gear mesh frequency and its harmonics. Bearing defects produce vibration at the bearing defect frequencies (calculated from bearing geometry and rotational speed). Regular measurement — monthly or quarterly — and trending of these frequency amplitudes provides early warning of developing component damage, typically 2 to 6 months before audible noise appears.
Method 3 — Temperature Monitoring
Continuous oil temperature monitoring using a thermocouple or thermistor in the oil sump, with the data logged by the machine PLC or a standalone data logger, provides the most accessible real-time gearbox health indicator. A rising oil temperature trend at constant production conditions indicates increasing internal friction — which can be caused by oil degradation, developing bearing wear, inadequate cooling, or increasing load. Automated high-temperature alarms integrated with the machine control system provide the first line of automated defence against overheating damage.
Method 4 — Motor Current Monitoring
Motor current is proportional to motor torque, which is directly related to the mechanical resistance in the drive system. A rising trend in motor current at constant screw speed and material conditions indicates increasing mechanical resistance — which can be caused by wear-related friction increases in the gearbox or by process changes. Many modern VSDs log motor current continuously and can provide trend data over weeks and months without additional instrumentation.
Recommended Condition Monitoring Schedule for Extrusion Gearboxes
Daily: Read and record oil temperature at start of each shift
Check oil level on sight glass
Note any unusual sounds or vibration during startup
Monthly: Clean and inspect drain plug magnet for metallic particles
Check and record cooling water inlet/outlet temperatures
Check coupling condition visually
Clean external housing and fins of dust accumulation
Every 6 months: Take oil sample for spectrometric analysis
Measure vibration at defined points on housing
Inspect shaft seals for seepage
Check gearbox axial shaft play (output shaft) with dial indicator
Annually: Full oil change with sump cleaning
Shaft alignment verification with laser alignment tool
Inspect cooling coil (if accessible)
Check all housing bolts for correct torque
Full visual housing inspection for cracks
Preventive Maintenance Schedule and Checklist
The following comprehensive preventive maintenance checklist consolidates all the prevention measures described in this guide into a structured schedule. Implementing this checklist consistently is the most effective action available to extend gearbox service life and prevent unplanned failures.
| Frequency | Maintenance Task | Target Condition | If Outside Target |
| Daily | Check oil temperature gauge reading | 40 – 75°C | Investigate immediately |
| Daily | Check oil level on sight glass | Between Min-Max marks | Top up with correct grade |
| Daily | Listen for unusual noise or vibration | Smooth, steady hum | Log and investigate |
| Daily | Confirm cooling water flow (warm outlet) | Warm to touch | Check water supply |
| Monthly | Clean and inspect magnetic drain plug | Minimal fine particles | Increased particles: oil analysis |
| Monthly | Check cooling water inlet temperature | Below 35°C | Investigate cooling tower |
| Monthly | Inspect shaft seal areas for oil seepage | Dry, no seepage | Replace seal at next PM |
| Monthly | Clean external housing and fins | Clean, no dust mat | Clean immediately |
| Monthly | Check coupling condition visually | No cracking or wear | Replace coupling element |
| 3-Monthly | Check and clean breather vent | Free flow, no blockage | Clean or replace breather |
| 3-Monthly | Take oil sample for visual assessment | Clear, correct colour | Accelerate to lab analysis |
| 6-Monthly | Take oil sample for spectrometric lab analysis | Within limits for grade | Investigate rising metals |
| 6-Monthly | Measure vibration at key housing positions | Stable vs baseline | Investigate rising amplitudes |
| 6-Monthly | Measure axial play on output shaft | Within spec clearance | Inspect thrust bearing |
| 6-Monthly | Check all external bolts for tightness | Correct torque (wrench) | Retighten to spec |
| Annually | Full oil change — drain, flush, refill | Fresh oil, clean sump | — |
| Annually | Verify shaft alignment (laser alignment) | < 0.05mm, < 0.03° | Re-align and re-check |
| Annually | Replace shaft seals (preventively) | New FKM seals fitted | — |
| Annually | Inspect cooling coil (descale if needed) | Clear bore, no scale | Chemical descaling |
| Annually | Full visual housing inspection for cracks | No cracks or seepage | NDT inspection |
| Annually | Check torque-limiting coupling setting | Set at 150–200% running | Adjust if drifted |
| 3–5 Years | Bearing inspection and replacement if needed | Per L10h calculation | Replace per condition |
When to Repair vs When to Replace
When a gearbox failure is discovered — whether through condition monitoring or through a production breakdown — one of the first decisions to be made is whether to repair the existing unit or to replace it. This decision has significant cost, timing, and risk implications, and making it correctly requires an honest assessment of several factors.
Factors Favouring Repair of the Existing Gearbox
- Single Component Failure with No Secondary Damage: If only one component has failed — a single seal, a single bearing, or an early-stage surface pitting issue on one gear set — and all other components are in good condition, targeted repair is likely the most cost-effective option.
- Gearbox is Recently New or Mid-Service-Life: A gearbox that is less than 5 years old with a known maintenance history and no history of chronic overloading is a good candidate for repair — the housing and most components still have substantial remaining life.
- Custom or Non-Standard Configuration: If the gearbox has a non-standard gear ratio, mounting configuration, or shaft arrangement that is difficult or time-consuming to source as a new replacement, repair may be preferred to avoid extended downtime waiting for a custom replacement.
Factors Favouring Full Replacement
- Multiple Component Failures or Cascade Damage: If the failure has been progressive and has damaged gears, bearings, and housing simultaneously, the cost of repairing all damaged components often approaches or exceeds the cost of a new gearbox — while leaving an older housing and other components at unknown remaining life.
- Gearbox is at or Past Design Service Life: A gearbox that has been in service for 15 to 20 years, even if it has been adequately maintained, has accumulated a substantial proportion of its component fatigue life. Repairing individual components while leaving others at their fatigue life limit creates high risk of further failures in the near term.
- Gearbox Was Incorrectly Specified for the Application: If the original gearbox was undersized for the actual torque demand or was not purpose-designed for extruder duty, repair perpetuates the fundamental sizing problem. Replacement with a correctly specified unit addresses the root cause.
- Improved Technology is Available: If the replacement gearbox offers significantly better efficiency, longer bearing life, improved thrust bearing design, or better sealing than the original unit, replacement delivers ongoing operational benefits that justify the capital expenditure.
| Decision Factor | Favour Repair | Favour Replacement |
| Number of failed components | Single component failure | Multiple simultaneous failures |
| Gearbox age | Less than 8 years old | More than 12 to 15 years old |
| Maintenance history | Well-maintained, records available | Poor maintenance, no records |
| Failure severity | Early-stage, no secondary damage | Catastrophic, cascade damage |
| Original specification | Correctly sized for application | Undersized or wrong type |
| Repair cost vs new cost | Less than 50% of new unit cost | More than 60% of new unit cost |
| Urgency of restart | Standard lead time acceptable | Emergency — stock unit available |
Our Gearbox Replacement and Support Services
When an extrusion gearbox fails — whether through a sudden breakdown or at the end of its service life — our team provides the complete support needed to get your line running again as quickly as possible, with a correctly specified replacement that will serve reliably for the next fifteen to twenty years.
What We Provide
- Emergency Replacement Supply: We maintain stock of our most common extruder helical gearbox configurations for fast delivery in urgent breakdown situations, minimising production downtime while a custom-specified unit is manufactured if required.
- Failure Root Cause Analysis: We examine failed gearboxes and identify the root cause of failure — providing a written diagnosis that distinguishes between a specification issue, a maintenance issue, and a random component fatigue failure. This analysis ensures the replacement unit is specified to avoid the same failure.
- Correct Replacement Specification: We calculate the correct gear ratio, output torque rating, service factor, thrust bearing capacity, and cooling system specification for the replacement unit — whether it is replacing the same size or upgrading to a more capable specification.
- Application Engineering Review: For each replacement, we review the full drive train — motor power, gear ratio, material processed, operating speed range, and ambient conditions — to confirm the replacement specification is correctly matched to all current application requirements, not just the original design conditions.
- Installation and Commissioning Guidance: We provide detailed installation instructions, shaft alignment specifications, oil fill quantities and grades, and commissioning run-in procedures for every gearbox we supply.
- Preventive Maintenance Programme: We can establish a preventive maintenance programme for your extrusion gearboxes — including oil analysis schedules, vibration monitoring baselines, and annual inspection protocols — that implements the condition monitoring best practices described in this guide.
Whether you need an emergency replacement today or want to review the long-term maintenance strategy for your entire extrusion line’s drive systems, our technical team is ready to help.
Frequently Asked Questions (FAQs)
Q1. My extruder gearbox is making a new rumbling or grinding noise. What should I do?
A new rumbling or grinding noise from an extruder gearbox is a serious warning that warrants immediate investigation — do not continue operating at normal production conditions and hope the noise resolves. The first step is to stop the machine at the earliest safe opportunity and check the oil level and condition. Dark, heavily contaminated oil with metallic debris on the drain plug magnet confirms internal component wear. If the oil appears normal, restart the machine carefully at low speed and try to localise where in the gearbox the noise originates. A rumbling noise that increases with speed typically indicates bearing damage. A rhythmic knocking at the gear mesh frequency indicates gear tooth damage. Either finding requires gearbox inspection before continued production operation.
Q2. How often should I change the oil in my extruder gearbox?
For mineral EP gear oil (ISO VG 220 or 320), change the oil every 3,000 to 5,000 operating hours, or every 12 months, whichever comes first. For synthetic PAO gear oil, the interval can be extended to 8,000 to 12,000 operating hours. However, these intervals assume normal operating conditions — an oil temperature consistently above 75 to 80 degrees Celsius halves the recommended interval. In heavily contaminated environments (plastic dust, glass fibre), shorten the interval to 2,000 to 3,000 hours. Periodic oil analysis (every 6 months) provides the most accurate basis for determining the actual oil change interval for your specific machine and operating conditions.
Q3. Can a damaged gear in my extruder gearbox be repaired, or does the whole gear set need replacing?
In most cases, individual gears within an extruder gearbox should be replaced as a meshing pair, not individually. This is because the mating gear has been running against the damaged gear and will have developed complementary wear patterns, running-in profiles, or surface damage even if it appears visually acceptable. Replacing only the damaged gear and leaving the worn mating gear in service typically results in rapid accelerated wear of the new gear as it tries to mesh with the worn profile of the old partner. The cost of replacing both gears in the mesh pair is usually modest compared to the labour cost of the rebuild, and it provides a known-good starting point for the repaired gearbox.
Q4. How do I know if my gearbox problem is caused by a lubrication issue vs a mechanical overload?
The failure mode evidence on the gear tooth surfaces provides the clearest distinction. Lubrication-related failures typically produce: uniform surface pitting across the full tooth face width (lubrication inadequacy affects the entire contact zone equally), a grey frosted appearance on tooth flanks (micropitting from insufficient film), or scoring and material transfer on the sliding zones of the tooth flank (scuffing from oil film collapse). Mechanical overload failures produce: tooth root cracks visible under magnification at the fillet radius, fracture with a characteristic fatigue beach mark pattern on the fracture face, or heavy pitting concentrated in the pitch line zone where contact stress is highest. Oil analysis helps distinguish between the two: lubrication failure produces rising iron from gear wear; overload failure may show a single large spike in particles following a specific overload event.
Q5. How long does an extruder gearbox typically last before it needs replacement?
A correctly specified, properly installed, and consistently well-maintained helical extruder gearbox should provide a minimum service life of 10 to 15 years in normal continuous extrusion duty, with many units achieving 20 years or more. The key factors that determine whether a gearbox reaches the upper or lower end of this range are: correct initial sizing with adequate service factor (the most important single factor); consistent oil changes at the recommended intervals; oil temperature maintained below 75 degrees Celsius; shaft alignment verified and corrected annually; and avoidance of chronic overloading through material changes without recalculation. Gearboxes that experience any combination of chronic overloading, delayed oil changes, persistent overheating, or poor shaft alignment typically reach end of useful service life in 5 to 8 years.
Conclusion
Every gearbox failure in a plastic extrusion machine is an event that could, in most cases, have been prevented. The ten failure modes described in this guide — from gear tooth surface pitting through thrust bearing collapse to housing cracking — all have identifiable root causes, progressive warning signs, and proven prevention strategies. The common thread running through all of them is that early detection and early intervention is always cheaper, faster, and less disruptive than allowing a developing failure to reach the catastrophic stage.
The preventive actions are not complex or expensive. Regular oil changes with the correct grade of gear oil at the specified intervals — a task that costs a few thousand rupees and a few hours of downtime — prevents the majority of gear tooth and bearing failures. Correct shaft alignment at installation and after any maintenance intervention prevents a significant proportion of bearing failures. Thermal management that keeps oil temperature below 75 degrees Celsius protects seals, oil integrity, and bearing life simultaneously. Periodic oil analysis and vibration monitoring provide objective evidence of component health that allows maintenance to be planned and executed before failure occurs.
The failure cascade diagram in Section 13 of this guide makes the economic argument for preventive maintenance more clearly than any other data: a single missed oil change can initiate a cascade of progressive failures that ultimately results in total gearbox loss and extensive production downtime, at a total cost 50 to 100 times the cost of the oil change that would have prevented it. No other investment in your extrusion line’s maintenance programme offers a comparable return.
Use the preventive maintenance checklist in Section 15 as the starting point for a structured maintenance programme for every gearbox on your extrusion lines. Implement the condition monitoring methods in Section 14 to move from calendar-based to condition-based maintenance decisions. And when a gearbox does eventually reach the end of its service life, use the repair versus replace framework in Section 16 to make the most cost-effective decision for your specific situation. Systematic, informed gearbox maintenance is not a cost — it is the most effective production investment available to any plastic processing plant.
