
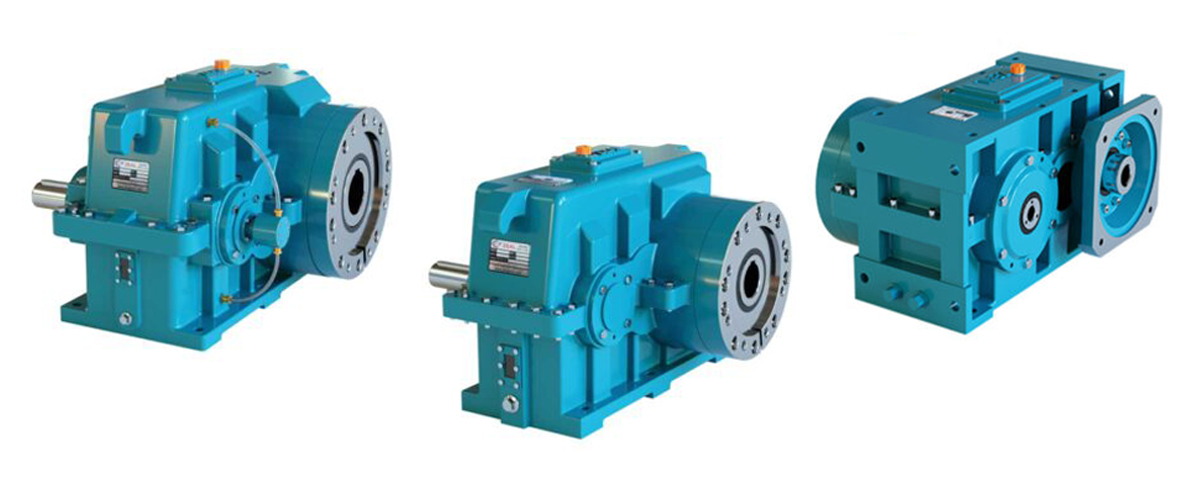
An extruder gearbox that starts making unusual noise is not just an annoyance — it is a distress signal. Every abnormal sound produced inside a helical gearbox is communicating something specific about the condition of its internal components. The ability to correctly interpret those sounds and translate them into accurate fault diagnosis is what separates a proactive maintenance team from one that waits for catastrophic failure. Extruder gearbox noise diagnosis is one of the most practical and cost-effective predictive maintenance skills a plant technician or engineer can develop. Unlike vibration analysis that requires specialist instruments, many gearbox noise patterns can be identified with basic tools, careful observation, and a solid understanding of what each sound means. In the plastic extrusion, rubber processing, and compounding industries, unplanned gearbox failure during production runs costs far more than just the repair bill. Lost production, scrapped material, emergency maintenance labour, and potential delivery penalties combine to make even a single gearbox failure a significant financial event. This guide covers everything you need to know about diagnosing noise problems in extruder gearboxes — the types of noise and what they indicate, the diagnostic tools and methods to use, the most common root causes, a step-by-step field diagnosis procedure, and the corrective actions that follow. Whether you manage a single extruder or an entire plant floor, this is the definitive reference for gearbox noise troubleshooting.
Why Extruder Gearboxes Are Particularly Prone to Noise Problems
Not all industrial gearboxes face the same operating conditions. Extruder gearboxes are among the most demanding in any manufacturing environment, and those demands create specific vulnerabilities that generate noise when things begin to go wrong.
The Unique Operating Environment of an Extruder Gearbox
An extruder gearbox must perform continuously — often 16 to 24 hours per day, six or seven days a week. It transmits high torque from the drive motor to the extruder screw, while simultaneously absorbing significant axial thrust generated as the screw pushes molten material through the die. This combination of high continuous torque, axial thrust loading, and non-stop operation creates conditions that rapidly expose any weakness in gear geometry, bearing quality, lubrication, or alignment.
Several factors make extruder gearboxes especially prone to developing noise problems over time:
- Continuous High-Torque Loading: Unlike intermittent-use gearboxes, extruder gearboxes carry near-full load for most of their operating life. This accelerates gear tooth surface fatigue, bearing wear, and lubricant degradation — all of which generate noise as they progress.
- Thermal Cycling: The gearbox sits adjacent to the heated extruder barrel. Repeated heating and cooling cycles cause differential thermal expansion in housing, shafts, and gear bodies — gradually altering clearances and preloads, which changes noise characteristics.
- Material Surges and Shock Loads: Changes in material viscosity, hard starts after maintenance shutdowns, and material compaction events send sudden shock loads through the gear train. Repeated shock loading damages gear tooth profiles and bearing raceways.
- Seal and Breather Deterioration: In plastic and rubber processing environments, airborne particles and vapours attack gearbox seals over time. Compromised seals allow contaminants into the oil, leading to abrasive wear that progresses with characteristic noise patterns.
At What Point Does Gearbox Noise Become a Problem?
New or recently serviced gearboxes produce a characteristic baseline noise level — a relatively uniform, low-level hum or whir from the gear mesh and bearings. Any deviation from this baseline — in pitch, frequency, rhythm, volume, or load-dependence — is significant and warrants investigation.
Key Principle: Never ignore a new noise in a gearbox that was previously quiet. Early-stage noise indicates a developing fault. Late-stage noise means the fault is advanced. Silent failure — gearbox seizure without warning — is the worst outcome and is almost always preceded by noise that was ignored.
The 8 Types of Extruder Gearbox Noise and What They Mean
Understanding the specific character of a noise is the foundation of accurate extruder gearbox noise diagnosis. Each fault type generates a distinctive sound pattern. Here is the definitive reference guide:
| Noise Type | Sound Description | Likely Cause | Priority |
| Whining / Howling | High-pitched, constant tone | Gear misalignment, tooth profile wear, incorrect oil viscosity | Medium — Monitor closely |
| Knocking / Clunking | Rhythmic heavy impact | Broken gear tooth, foreign object, severe backlash | CRITICAL — Stop immediately |
| Grinding | Harsh, scraping sound | Metal-to-metal contact, oil film failure, bearing race damage | CRITICAL — Stop immediately |
| Rumbling | Low-frequency vibration hum | Worn or failed bearing, inadequate bearing preload | High — Inspect within 48 hrs |
| Rattling | Irregular metallic rattle | Loose fasteners, damaged keys/keyways, worn splines | Medium — Inspect at next stop |
| Squealing | Sharp intermittent squeal | Dry bearing, seal lip dragging on shaft, insufficient lubrication | High — Check oil level now |
| Intermittent Click | Regular click per shaft rotation | Single damaged gear tooth, debris in mesh | High — Inspect within 24 hrs |
| Vibration / Hum (Low) | Resonant hum under load | Gear resonance, unbalanced coupling, loose mounting bolts | Medium — Monitor and record |
How to Characterise the Noise Correctly
Before attempting diagnosis, gather the following information about the noise:
- Pitch / Frequency: Is it high-pitched (whine, squeal) or low-pitched (rumble, hum)?
- Rhythm: Is it constant, or does it occur rhythmically in sync with shaft rotation?
- Load Dependence: Does the noise appear or worsen under load, or is it present at idle too?
- Speed Dependence: Does the noise increase with speed, or occur only at certain RPM?
- Temperature Dependence: Does the noise appear only after warm-up, or is it present from cold start?
- Location: Can you isolate whether the noise comes from the input side, output side, or a specific bearing location?
Recording these observations before opening the gearbox dramatically improves the accuracy of diagnosis and reduces unnecessary disassembly.
Diagnostic Tools for Extruder Gearbox Noise Analysis
Effective extruder gearbox fault diagnosis does not always require expensive instrumentation. The following tools — ranging from basic to advanced — allow you to identify the cause of gearbox noise with increasing precision:
| Tool | What It Detects | When to Use |
| Stethoscope / Contact Probe | Bearing noise, gear mesh frequency | First-level diagnosis, no shutdown required |
| Vibration Analyser (FFT) | Gear mesh frequency, bearing defect frequencies, imbalance | Precision diagnosis without disassembly |
| Infrared Thermometer | Hot spots at bearings or housings indicating friction | Quick surface scan during operation |
| Oil Sample / Analysis | Metal particles, water contamination, additive depletion | Monthly or when noise first appears |
| Borescope / Inspection Camera | Visible gear tooth damage, debris, corrosion | Before opening gearbox fully |
| Dial Indicator / Runout Gauge | Shaft misalignment, coupling runout | After suspected misalignment or shock load |
| Decibel Meter | Overall noise level trend over time | Baseline recording and trend monitoring |
How to Use a Stethoscope for Gearbox Diagnosis
An automotive mechanic’s stethoscope with a metal probe is one of the most effective — and most underutilised — tools for gearbox noise diagnosis. Touch the probe to the gearbox housing at different locations while the machine runs at normal operating load. The bearing locations on the housing (directly above each bearing bore) will transmit significantly different sound profiles depending on bearing condition:
- Healthy bearing: Smooth, faint whir with no distinct frequencies.
- Failing bearing: Rumbling, grinding, or a distinct high-frequency hiss indicating raceway damage.
- Gear mesh noise: A rhythmic tonal sound that changes frequency with speed — heard most clearly near the gear mesh zone of the housing.
Vibration Analysis (FFT) — The Gold Standard
Fast Fourier Transform (FFT) vibration analysis converts the raw vibration signal from the gearbox housing into a frequency spectrum. Each mechanical component inside the gearbox produces vibration at a predictable frequency related to its rotational speed. By comparing the measured frequency spectrum against calculated fault frequencies, it is possible to identify:
- Which specific bearing is failing and which defect (inner race, outer race, rolling element, cage) is present
- Whether gear mesh frequency amplitude is elevated — indicating tooth wear, misalignment, or overloading
- Whether sidebands around gear mesh frequency indicate modulation — a sign of eccentric gear mounting or shaft bow
- Whether there is imbalance or misalignment in the coupling between motor and gearbox
FFT analysis can detect bearing and gear faults weeks or months before they become audible — making it the most powerful predictive maintenance tool for extruder gearboxes in continuous production environments.
Step-by-Step Field Diagnosis Procedure
When a noise complaint is raised about an extruder gearbox, follow this structured diagnostic sequence. This procedure is designed to deliver a root cause conclusion with minimum machine downtime.
Step 1 — Safety First
Before approaching any running gearbox for noise diagnosis:
- Ensure PPE is worn (safety glasses, hearing protection, gloves)
- Confirm that no covers, guards, or coupling shields are removed while the machine is running
- Do not place hands or instruments near rotating shafts, couplings, or pulleys
- If the noise is a knock or grind classified as CRITICAL in Table 1 — stop the machine immediately before any diagnosis
Step 2 — Establish the Noise Baseline
If the machine is still running safely, take the following baseline measurements before any intervention:
- Record the noise level (dB) at a consistent measuring point — typically 1 metre from the gearbox housing
- Note the noise character: pitch, rhythm, and load dependence as described in Section 2
- Check and record the oil level in the sight glass
- Take a surface temperature reading at each bearing location using an infrared thermometer — record all readings
- If available, take a vibration reading at each bearing housing
Step 3 — Vary the Operating Condition
With the machine running at a safe noise level, vary the operating condition and observe changes in the noise:
- Reduce to no-load (idle): If noise disappears or reduces significantly, the fault is load-dependent — likely gear-related (tooth damage, misalignment, overloading).
- Increase speed gradually: If noise frequency increases proportionally with speed, it is rotation-related — bearing or gear mesh frequency.
- Run to operating temperature: If noise appears only after warm-up, suspect thermal expansion issues, deteriorated oil viscosity, or a tight bearing with insufficient clearance.
Step 4 — Oil Condition Check
Drain a small oil sample from the gearbox into a clean, clear container while the machine is at operating temperature. Observe:
- Colour: Dark brown or black oil indicates oxidation and thermal degradation. Amber or light brown is normal for used oil.
- Clarity: Milky or cloudy oil means water contamination — this is a critical finding. Stop the machine.
- Metallic particles: Visible metallic flakes or a metallic sheen indicate active gear or bearing wear. Drain completely and inspect internals.
- Level: Oil below the minimum mark on the sight glass means the gear and bearing surfaces have been running oil-starved — a direct cause of grinding and squealing noise.
Step 5 — Isolate the Noise Location
Using a stethoscope or contact probe, systematically touch the probe to the following points on the gearbox housing in sequence, listening for the loudest, most distinct noise at each point:
- Input shaft bearing housing (motor side)
- Output shaft bearing housing (extruder screw side)
- Intermediate shaft bearing housings (if multi-stage gearbox)
- Gear mesh zone — the housing wall closest to where the gear teeth engage
- Thrust bearing location — typically on the output shaft at the extruder end
The point that produces the most distinct or loudest noise is the primary fault location. Photograph and mark it for the inspection team.
Step 6 — Correlate with Table 1 and Decide Action
Match your observations against the Noise Type Diagnosis table (Table 1 in Section 2) and determine the priority:
- CRITICAL (Knock / Grind): Stop the machine immediately. Do not continue running. Begin disassembly inspection on next planned stop or emergency basis.
- HIGH Priority: Schedule inspection within 24–48 hours. Increase monitoring frequency. Prepare spare parts.
- MEDIUM Priority: Log the observation, increase oil check frequency, and schedule inspection at next planned maintenance window.
The 8 Most Common Root Causes of Extruder Gearbox Noise
Based on field experience across plastic, rubber, and compound extrusion plants, the following root causes account for the large majority of extruder gearbox noise complaints:
| Root Cause | Associated Noise | Recommended Action |
| Insufficient / degraded oil | Whining, squealing, grinding | Immediate oil change, check level |
| Bearing failure | Rumbling, grinding, howling | Replace bearing, check alignment |
| Gear tooth damage | Click, knock, irregular impact | Full inspection, replace gear set |
| Shaft misalignment | Whining, vibration under load | Re-align, check coupling |
| Loose mounting | Rattle, vibration at housing | Torque all fasteners to spec |
| Overloading | Constant high-level whine | Review load specification |
| Foreign object / debris | Irregular click or grind | Drain, flush, inspect internals |
| Incorrect backlash | Knocking on load reversal | Adjust or replace gear set |
Root Cause 1: Insufficient or Degraded Lubrication
The single most common cause of extruder gearbox noise is inadequate lubrication. This manifests as whining, squealing, or grinding depending on severity. Oil starvation removes the lubricant film between gear teeth and bearing surfaces, causing direct metal-to-metal contact. The heat generated by this contact degrades the oil further and accelerates wear — a self-reinforcing cycle that ends in seizure if not addressed.
Diagnostic indicators: Oil level below minimum, dark or burnt-smelling oil, elevated temperature at bearing locations, metallic particles in oil sample.
Root Cause 2: Bearing Failure
Bearings are the most frequently replaced components in extruder gearboxes. Bearing noise typically presents as a low-frequency rumble (rolling element or raceway damage) or a higher-frequency hiss (early-stage cage or surface damage). Bearing failure in an extruder gearbox is almost always preceded by weeks of increasing noise and vibration if monitored correctly.
Diagnostic indicators: Elevated temperature at specific bearing location, rumbling noise that correlates with shaft rotation speed, high FFT amplitude at calculated bearing defect frequencies.
Root Cause 3: Gear Tooth Damage
Gear tooth damage produces a highly characteristic rhythmic clicking or knocking that repeats at the frequency of the damaged gear’s rotation. A single chipped or broken tooth produces one knock per revolution of that gear. As the damage worsens, the knocking intensifies and may be accompanied by metallic debris in the oil. Gear tooth damage most commonly results from overloading, shock loads, or operation with contaminated oil.
Diagnostic indicators: Rhythmic clicking synchronised with shaft speed, metallic debris in oil sample, FFT sideband patterns around gear mesh frequency.
Root Cause 4: Shaft Misalignment
When the input shaft of the gearbox is not correctly aligned with the drive motor output shaft, the misalignment creates cyclical loading on the gear teeth and bearings with every revolution. This produces a characteristic whining noise that tends to be load-dependent and may be accompanied by coupling wear or vibration at the motor-gearbox junction. Misalignment also causes seal damage and premature bearing failure on the input side.
Diagnostic indicators: Whining noise, accelerated coupling wear, elevated vibration at 1x and 2x shaft rotation frequency, noise worse under load.
Root Cause 5: Incorrect Backlash
Gear backlash is the intentional clearance between meshing gear teeth. If backlash is excessive — from gear wear, incorrect assembly, or wrong gear pair — the gears knock against each other on load reversal or during torque fluctuations. If backlash is insufficient — from thermal expansion or incorrect shimming — the gears bind under load, generating whining and heat. Both conditions are audibly distinct and diagnosable without disassembly.
Noise Behaviour Under Different Operating Conditions
One of the most powerful diagnostic techniques is observing how gearbox noise changes with operating conditions — load, speed, and temperature. This table provides a structured reference for interpreting noise behaviour:
| Noise Behaviour | Under Load | At Idle / No-Load |
| Noise increases sharply | Gear tooth damage, overload, misalignment | N/A — load-dependent only |
| Noise present always | Bearing failure, severe gear wear | Bearing failure, oil starvation |
| Noise only at idle | Disappears — gear clearance at low torque | Loose internal components, backlash |
| Noise at certain speed | Resonance at natural frequency | Gear mesh frequency resonance |
| Noise after warm-up | Thermal expansion issues, wrong clearances | Oil thinning with heat |
Corrective Actions After Diagnosis
Once the root cause is identified, the correct corrective action must follow promptly. Here is the action framework for the most common diagnosis outcomes:
For Lubrication-Related Noise
- Stop the machine if noise is grinding or squealing — running further risks seizure.
- Check and top up oil level immediately if below minimum.
- If oil is degraded (dark, burnt, milky, or contaminated), drain completely while warm.
- Flush the gearbox with clean oil of the correct grade. Drain the flush oil after 15–20 minutes of low-load running.
- Refill with fresh oil to the correct level — ISO VG 220 or VG 320 as per specification.
- Monitor temperature and noise for the first 2 hours after oil change.
- If noise persists after fresh oil, the internal damage may already require mechanical inspection.
For Bearing-Related Noise
- Schedule bearing replacement at the identified location at the earliest planned shutdown.
- Do not continue running a gearbox with a confirmed failed bearing — catastrophic collapse of a bearing in an extruder gearbox can damage gear teeth and contaminate the entire oil sump.
- When replacing, check shaft for scoring, check housing bore for fretting, and measure bearing seat diameter before fitting new bearings.
- Verify bearing selection matches the original specification — axial load capacity is critical for extruder output shaft bearings.
- After replacement, check alignment, fill fresh oil, and run under gradual load increase for the first 30 minutes.
For Gear Tooth Damage
- Do not continue running if knocking is present — a single broken tooth can trigger cascade failure of the entire gear set within hours.
- Drain the oil and inspect for metallic debris. Severe debris (chunks rather than fine particles) confirms tooth fracture.
- Plan a full gearbox disassembly and inspection. Photograph all gear tooth surfaces.
- Replace the damaged gear or full gear set as required. Single gear replacement without checking its mating gear is a false economy.
- Investigate root cause before reassembly — was the damage from overloading, shock, or oil starvation? Address the root cause, not just the symptom.
For Misalignment
- Mark the coupling position and disconnect at the earliest planned stop.
- Use a dial indicator or laser alignment tool to measure and correct shaft alignment.
- Check coupling condition — misalignment accelerates coupling wear.
- Re-align to within 0.05 mm parallel and angular tolerance as a minimum.
- Inspect input shaft bearing after correcting alignment — misalignment-induced bearing damage may require replacement.
Preventive Practices to Eliminate Gearbox Noise Before It Starts
The best gearbox noise diagnosis is the one you never need to do — because the problem never developed. The following preventive practices, if implemented consistently, reduce the incidence of extruder gearbox noise problems by over 80% based on field maintenance data:
- Weekly oil level checks: Low oil is the number one cause of noise and the easiest to prevent. Five seconds at the sight glass every week.
- Monthly oil condition inspection: Colour, clarity, smell, and particle check. Intervene before the oil degrades to the point of causing damage.
- Scheduled oil changes: Mineral oil every 2,000 hours, synthetic every 6,000–8,000 hours. Do not extend intervals without oil analysis data to support it.
- Breather maintenance: Clean or replace the gearbox breather at every oil change. A clogged breather causes internal pressure that pushes oil past seals and allows contamination in.
- Shaft alignment verification: Check coupling alignment after every motor or gearbox removal, and annually on high-duty extruder lines.
- Vibration baseline recording: Record a vibration signature on each gearbox at commissioning and after each major service. Trend analysis against the baseline detects developing faults weeks before they become audible.
- Noise logbook: Train operators to report any new noise immediately and log it with date, character, and operating condition. Early reports save gearboxes.
Correct oil grade: Using the wrong ISO VG grade — particularly too low a viscosity in a high-load extruder application — causes chronic whining and accelerated tooth wear. Verify the grade on the nameplate.
When to Call a Gearbox Specialist
Some gearbox noise problems can be resolved by an in-house maintenance team with the right tools and information. Others require specialist expertise. Call a gearbox manufacturer or specialist service team when:
- Noise persists after oil change and basic checks — the fault is mechanical and requires disassembly
- FFT analysis shows multiple elevated frequencies — complex multi-fault scenarios require expert interpretation
- The gearbox has suffered a catastrophic event (sudden loud bang, locked screw, major oil loss) — internal damage may affect structural integrity
- The gearbox is out of production and cannot be disassembled in-house due to lack of tooling or expertise
- You need to assess whether repair or replacement is more cost-effective for the remaining service life
Zeal Gears Pvt. Ltd. provides gearbox inspection, repairing, and rebuilding services through its dedicated service department. With 50+ technicians experienced in extruder gearbox fault diagnosis and repair, Zeal Gears supports plants across India in returning failed or noisy gearboxes to full operating condition quickly and reliably.
Contact Zeal Gears for gearbox service support: +91 97372 46363 | info@zealgears.com
Frequently Asked Questions
Q1. What does a whining noise in an extruder gearbox indicate?
Whining is the most common noise complaint in extruder gearboxes and has several potential causes. The most frequent is incorrect oil viscosity — either too thin for the load, degraded through use, or at a low level. Gear tooth misalignment is another common cause, producing a tonal whine that varies with load. If the whine appeared gradually over weeks or months, it typically indicates progressive gear tooth wear. If it appeared suddenly, suspect oil loss or a recent maintenance error such as wrong oil grade or incorrect gear mesh setting after reassembly.
Q2. Is it safe to continue running an extruder gearbox that is making noise?
It depends entirely on the type of noise. A low-level whine or hum that has been stable for weeks and does not worsen under load may be monitored with increased frequency while the root cause is investigated. However, knocking, grinding, or any noise that is worsening rapidly — especially if accompanied by elevated temperature or oil contamination — requires an immediate stop. Continuing to run a gearbox with active bearing or gear damage accelerates the failure and risks converting a repairable gearbox into one that needs full replacement.
Q3. Why does my extruder gearbox make more noise under load than at idle?
Noise that increases significantly under load is almost always gear-related rather than bearing-related. Gear tooth contact stress increases proportionally with torque. Faults that generate noise under load include: gear tooth profile wear (which reduces contact ratio and concentrates stress), shaft misalignment (which creates cyclical overloading as the shaft rotates), insufficient oil film at the gear mesh (related to oil grade or level), and excessive backlash that allows tooth impact as load direction fluctuates. Bearings, by contrast, tend to produce noise at all loads since they carry radial loads even at idle.
Q4. What causes a knocking noise in an extruder gearbox?
A rhythmic knocking that repeats with shaft rotation is almost always caused by a damaged or broken gear tooth. Each time the damaged tooth passes through the mesh, it impacts the mating gear tooth abnormally — producing the distinctive knock. The frequency of the knock (how many times per minute) relates directly to the rotational speed of the shaft carrying the damaged gear, which helps identify which gear stage is affected. Knocking can also be caused by foreign objects inside the gearbox, severe backlash, or a broken bearing cage. All knocking conditions are classified as critical and require immediate shutdown.
Q5. How do I know if the noise is coming from the gearbox or the motor?
The most reliable method is to decouple the motor from the gearbox input and run the motor alone briefly — if the noise disappears, it is confirmed as gearbox-origin. If both run together but the noise persists when the gearbox input is stationary (during a brief no-load test), the noise is motor-side. A stethoscope contact probe used systematically on both the motor frame and the gearbox housing will also isolate the louder source. The thermal profile is also helpful — a motor fault typically heats the motor, while a gearbox fault heats the gearbox housing.
Q6. Can gearbox noise be eliminated by adding more oil?
If the gearbox is genuinely low on oil, topping up to the correct level will often reduce or eliminate oil-starvation-related noise (whining, squealing) relatively quickly — sometimes within minutes of the oil reaching operating temperature and circulating properly. However, adding oil will not resolve mechanical faults such as bearing damage, gear tooth wear, or misalignment. It is also important not to overfill — oil above the maximum level causes churning and foam, which can worsen noise and lead to oil being expelled through seals.
Q7. How often should I inspect an extruder gearbox for noise and vibration?
The minimum recommended inspection frequency for continuous-duty extruder gearboxes is a weekly operator walk-around (listening and feeling for new noise or vibration), a monthly detailed maintenance check (oil condition, temperature, and systematic noise assessment), and a biannual or annual formal vibration analysis with FFT. Plants with older gearboxes, those running above rated load, or those in harsh environments should inspect more frequently. The single most impactful habit is training extruder operators to report new noises immediately rather than normalising them.
Conclusion
Diagnosing noise problems in extruder gearboxes is a structured process — not guesswork. Every abnormal noise in a helical gearbox is a data point. Whining means oil or alignment. Knocking means tooth damage. Rumbling means bearing wear. Grinding means metal-to-metal contact. When you know what each sound means, you can make fast, accurate decisions that protect your equipment and your production schedule.
The key is to act early. A noise identified at the whine stage costs an oil change. A noise identified at the knock stage costs a gear set. A noise that reaches the grinding stage can cost an entire gearbox — plus the downtime that comes with emergency replacement.
Implement the diagnostic procedure in Section 4, use the noise reference table in Section 2, follow the corrective actions in Section 7, and build the preventive practices in Section 8 into your maintenance calendar. Your extruder gearboxes will reward you with longer service life, lower maintenance costs, and fewer production interruptions.
Need expert support for a noisy or failing extruder gearbox? Contact Zeal Gears Pvt. Ltd. for gearbox inspection, repair, and replacement services across India.
